Servicing my Hamilton 992B Railway Special - Model 2 - 1947 - Pt 2

Posts
17,465
Likes
36,611
Amplitude?

I'm letting the movement power down so I can check the pivots etc. again. On the timegrapher with lift angle at 40 degrees I'm getting an amplitude of 134 degrees, which I expected as its very low on power. However, I just filmed the balance in slow motion and to me it looks like the amplitude is closer to 330 degrees as shown by the balance arm I marked with a felt pen.


Am I going nuts or is there another explanation?
 
Posts
2,399
Likes
6,935
Amplitude?

I'm letting the movement power down so I can check the pivots etc. again. On the timegrapher with lift angle at 40 degrees I'm getting an amplitude of 134 degrees, which I expected as its very low on power. However, I just filmed the balance in slow motion and to me it looks like the amplitude is closer to 330 degrees as shown by the balance arm I marked with a felt pen.


Am I going nuts or is there another explanation?

Amplitude is the arc from rest position (when the watch is not running) to peak amplitude. The 330 degrees you are referring to is peak to peak arc (so 165 degrees amplitude). Check this out.
 
Posts
17,465
Likes
36,611
Amplitude is the arc from rest position (when the watch is not running) to peak amplitude. The 330 degrees you are referring to is peak to peak arc (so 165 degrees amplitude). Check this out.

Thanks Michel, it appears that my brain couldn't get that concept. However, after re-reading the document that Chris posted and thinking about it for a while it makes sense. Those old watch school videos are great education as well, I stumbled across them a couple of years ago but will obviously have to re-visit.

Is there any way I can make my question vanish before @Archer and @ChrisN see it 😉.

Back to the drawing board.

Will advise on progress.
 
Posts
2,399
Likes
6,935
There are lot of concepts to learn about watchmaking. I'm currently practicing on an inexpensive pocket watch and Chris (and Al too) have been a terrific help to steer me in the right direction. Set your time machine to 44 degrees lift angle to see if you can get 180 amplitude when the balance wheel makes a full turn on each cycle on the video.

The "slo-mo" video capability of smart phones is a terrific tool to determine lift-angle.
 
Posts
29,115
Likes
75,242
Thanks Michel, it appears that my brain couldn't get that concept. However, after re-reading the document that Chris posted and thinking about it for a while it makes sense. Those old watch school videos are great education as well, I stumbled across them a couple of years ago but will obviously have to re-visit.

Is there any way I can make my question vanish before @Archer and @ChrisN see it 😉.

Back to the drawing board.

Will advise on progress.

I saw the question around 4 am on my phone this morning when I couldn't sleep, and before anyone had replied, so too late Jim! I didn't watch the video, but I didn't need to as I knew what it was going to show, as it's a common misunderstanding of the fundamentals of what amplitude is.

I've mentioned several times before in my posts here that the amplitude you see displayed on the screen of your timing machine is an average - there is an amplitude in each direction, and the amplitude displayed is the average of those two amplitudes. I guess until you get to a point where you don't have a proper lift angle and are forced to actually look at what's going on do you start to ask these questions, so I suppose me saying that what's displayed is an average likely seems rather obscure until you are face to face with this problem.

If you ever get to the level of adjusting pallet fork jewels, and have a timing machine with a scope function, you can display the 2 amplitudes separately and see how close they are. Ideally you want them to be equal, and this can be affected both by beat error and how those jewels are adjusted in and out in relation to the escape wheel teeth.

The common basic understanding of beat error is that it's the difference between the "tick" and the "tock", but usually people stop there thinking about it, and only know it should be close to zero. Well if you really give a little extra thought to how it is that the tick and tock can be different, you'll pretty quickly realize it's because the amplitude in each direction is different, therefore the time for travel of the balance is different - these ideas are all related to each other and have real practical implications when troubleshooting (for example when you encounter rebanking).

Cheers, Al
 
Posts
17,465
Likes
36,611
I saw the question around 4 am on my phone this morning when I couldn't sleep, and before anyone had replied, so too late Jim! .....................................
Cheers, Al

Thanks mate.
I think I was too busy playing with toys (slomo on the iPhone) and became mesmerised by it and it took me a while to get back to basics with the help of Chris's Witschi document and a gentle prod from Michel.
I'm going to strip the movement down again tomorrow and put everything back under the microscope and re-epilame/re-oil the escape and pallets.

At the moment the movement has almost run completely flat so letting down the rest of the power and starting all over won't be too bad.

Once again, thanks to all here for your guidance and support.

Cheers

Jim
 
Posts
17,465
Likes
36,611
Back to work. I cleaned and re-oiled the escape wheel after treating with epilame, didn't oil the pallets but let the oil from the escape teeth do that.

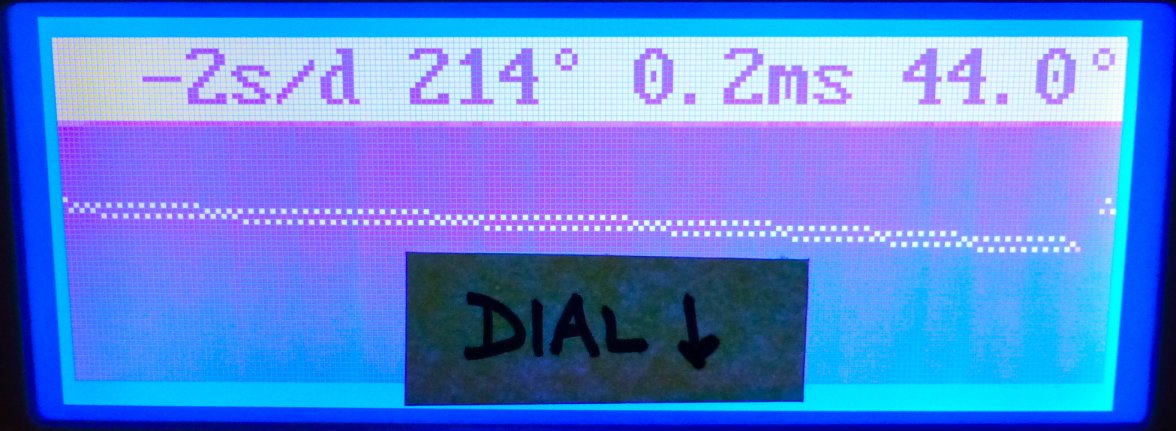
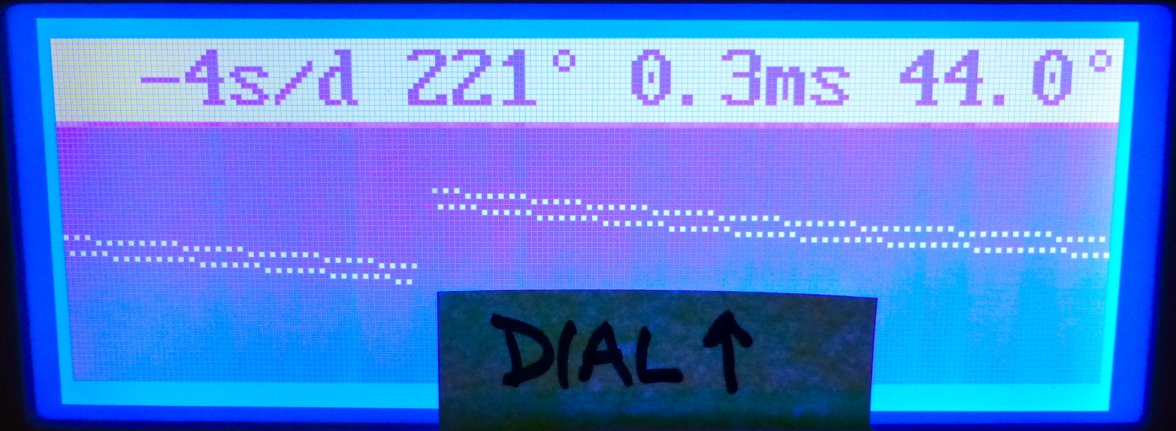
Back on the timing machine set to LA of 44° and I get reasonable figures for DU and DD without adjusting yet.
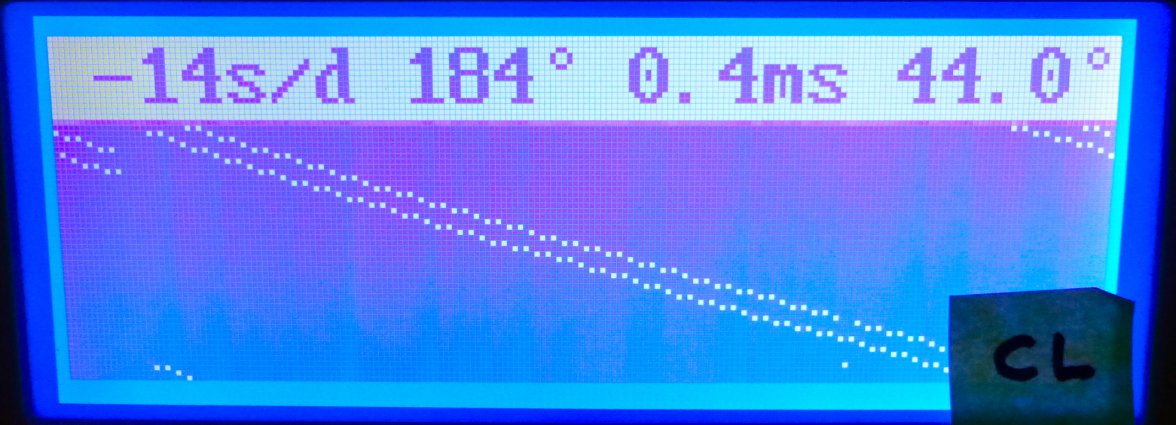
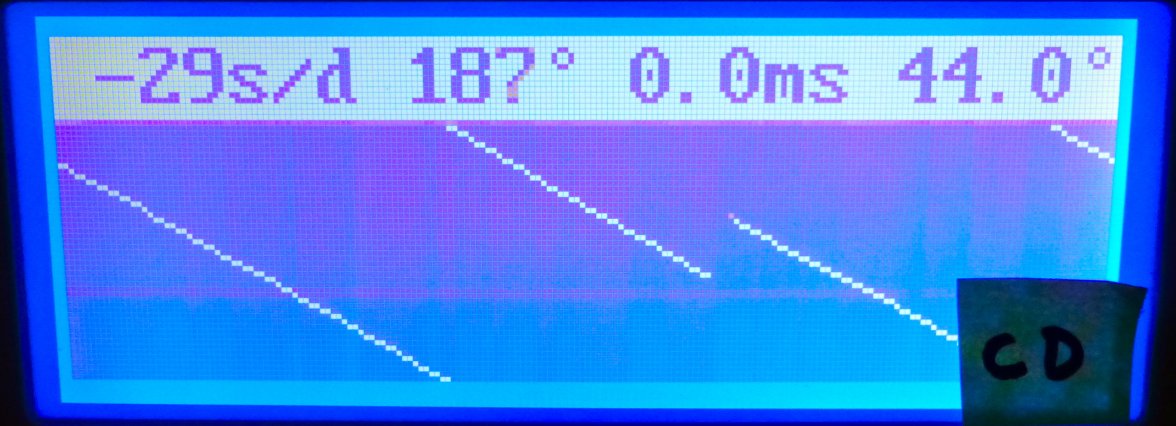
But when the side positions are done, there is a drop in amplitude and a definite retardation in rate.

Any suggestions (I'll keep reading to see if I can find a reason).

Timegrapher shots are below.

Edited:
 
Posts
29,115
Likes
75,242
Hi Jim,

If the lift angle is right, the balance amplitude is low. Can't recall if you replaced the mainspring, so if this has a blued steel spring in it still, I would replace that with a white alloy spring as the blued steel springs are often very set.

So what checks/adjustments of the balance spring have you done so far? I typically do my initial checks and adjustments right after cleaning, so I lubricate the balance jewels and mount the balance on the main plate - this allows me a clear view all around the balance spring:


I check to make sure that the coils of the spring are all concentric, evenly spaced, that the spring is flat, and that the portion of the spring that goes through the regulating pins is centered between those pins. In a watch with the ETACHRON system, I also set the distance between the regulating pins. These are the basic adjustments I do on every watch, and all this must be done before proceeding. From there the timing machine guides my next steps.

I then look at the readings for any really off measurements, so make sure the amplitudes all look as they should, and I don't have any major differences between the 4 vertical measurements, or between the 2 horizontal. I then look at the timing numbers for any wild readings, but also to note the difference between the average of the 2 horizontal readings, and the average of the 4 vertical readings. If the averages are significantly different, then adjustments to the regulating pins may be required.

Generally speaking, if the average of the vertical readings is slower than the horizontal, as in your case, then the pins are too far apart. If the average of the vertical is faster than the horizontal, the pins are too close together.

Now when adjusting the pins, you need to keep them parallel. Not having the parallel is a common source of dial up to dial down timing errors. This is an extreme example of what I mean from a Tudor I'm working on that was a complete mess - regulating pins as the watch was received:


And after adjusting:


As a rule of thumb I typically want the pins to be spaced so that there is about the thickness of the balance spring clearance on either side, and then adjust from there based on results again.

Cheers, Al
 
Posts
2,399
Likes
6,935
It's expected the lying positions (Dial-up and Dial-down) have better amplitude than the pendant positions because the latter have higher pivot friction.

It's good that lying positions are close in amplitude. What is the amplitude at full wind? Like Al mentioned the values are low. It should be above 270 degrees. In your previous post you mention 270-290 with the 40 degree lift angle.
 
Posts
15,190
Likes
44,627
When I service a railroad watch, I always check the balance wheel for poise. While the hairspring is off the balance, I position the hairspring on the balance cock, outer coil between the curb pins, and flip the cock over to check to assure that the collet is centred precisely over the top balance jewel. If the collet is off centre by as little as a few hundredths of a millimetre, accuracy can be compromised. Adjustments can be made by tweaking the overcoil. No adjustment to the overcoil to centre the collet should take place between the stud and the curb pins.
 
Posts
17,465
Likes
36,611
Many thanks for the guidance gents, I'll investigate tomorrow.


.......In your previous post you mention 270-290 with the 40 degree lift angle.

Yep, I changed an old blue steel mainspring for a new one but I don't know what effect it's had yet. It'll be a busy day tomorrow 😁.
 
Posts
15,190
Likes
44,627
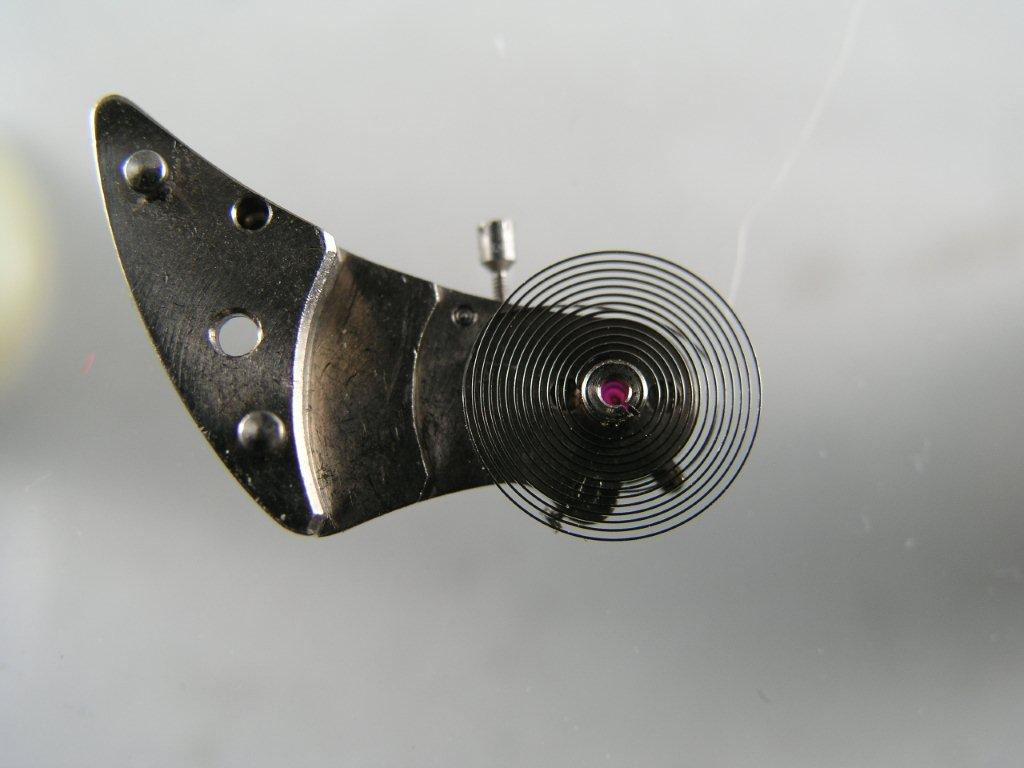
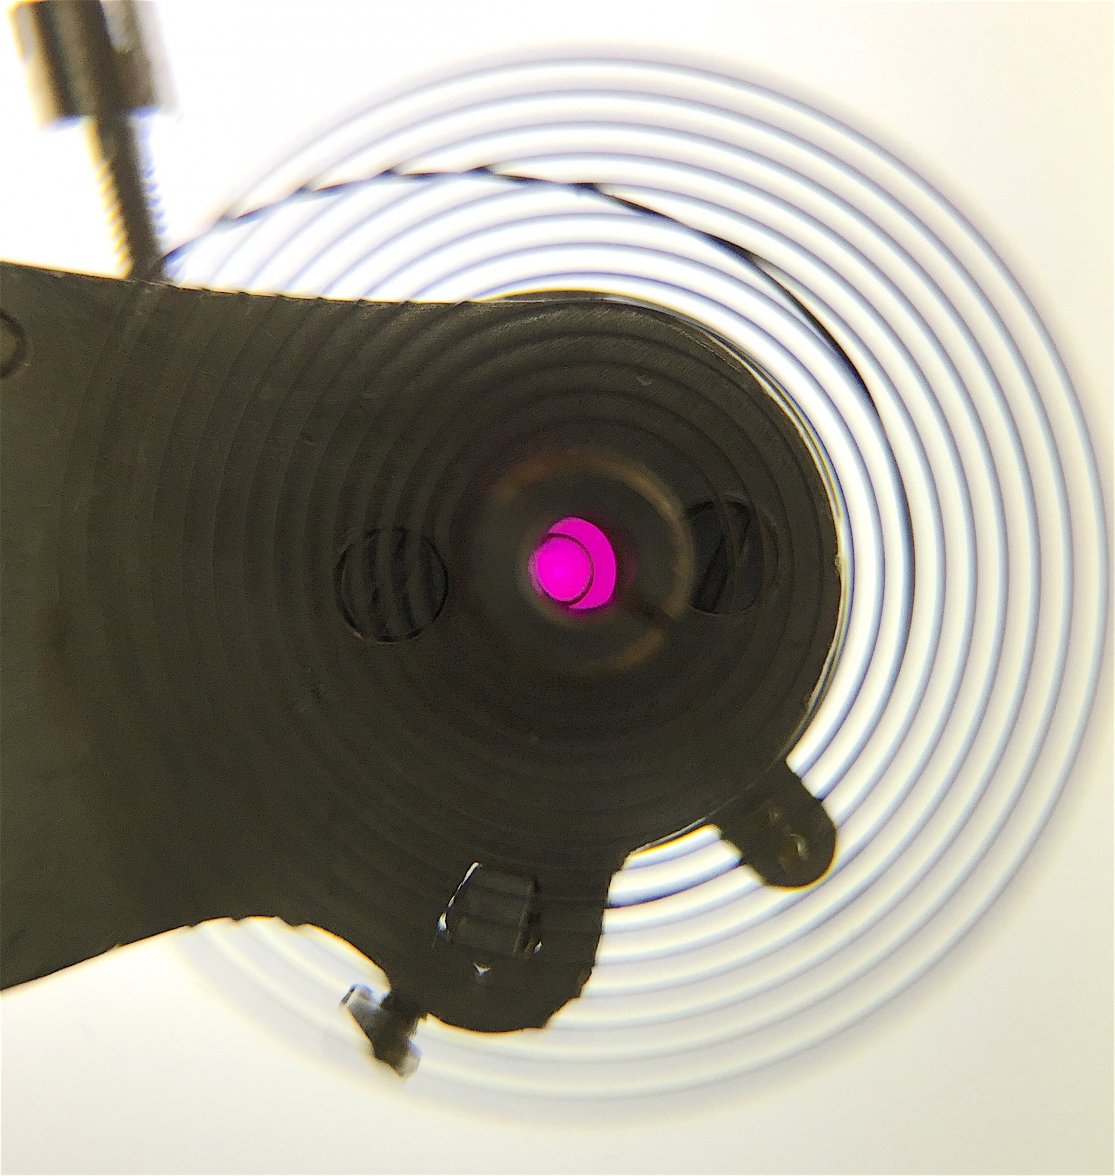
A number of years ago, a locomotive engineer took his 992B to a railroad watch inspector for its usual service. He got it back but found that it was an inconsistent timekeeper. He took it back numerous times for the same result. He asked me to have a look at it. The very first thing I noticed was that the hairspring collet was off center, and it showed in the coils of the hairspring, before I took the watch apart. I removed the hairspring from the balance wheel, and fitted it to the balance cock, flipped the cock over, and this is what i saw! The hairspring collect off center.


You might ask if something that small would be a serious problem. It wouldn't be if you were satisfied with erratic performance, and 30 second to one minute per day variation in a railroad watch that should be accurate to 30 seconds per week, or better.

I centered up the hairspring, poised the balance, conditioned the watch, and returned it to him. The next time i spoke to him about his Hamilton was about six weeks later. I asked him how it was doing. It was 15-seconds out! I asked when it had last been re-set, he said it hadn't stopped or been re-set since it was returned to him.
 
Posts
17,465
Likes
36,611
...The very first thing I noticed was that the hairspring collet was off center, ...........

Well I took your advice and my hairspring has the same problem.


Pointers on where to correct the position would be appreciated, I would assume after the overcoil bend just near where the regulator screw is at about 10:30 position?

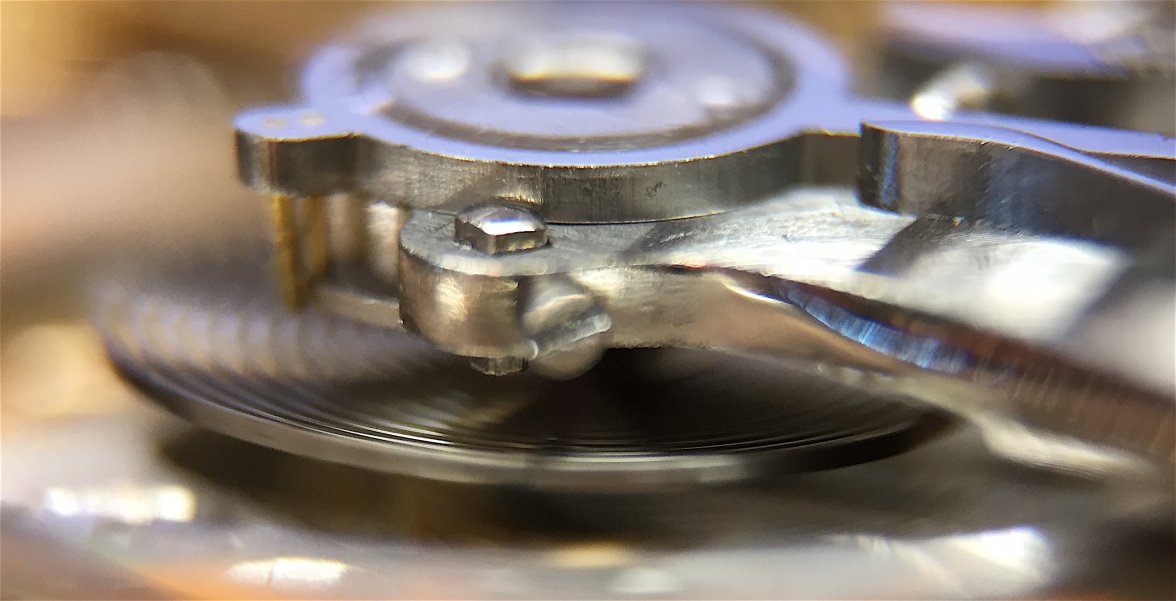
Another thing I noticed is that the hairspring stud was sitting above the face of the balance cock.


As you can see, the spring isn't truly flat.
Is the stud to be adjusted up and down to correct hairspring alignment?

I'm off to check the poise of the balance wheel now.
 
Posts
15,190
Likes
44,627
The hairspring should be flat. So lowering the stud would do that. As to centering the collet, I would make the adjustment at about the 2:00 position on the overcoil. That is, the 2:00 o'clock position viewed from the under side as shown. Obviously, that perspective would change once you turn the hairspring over to make the adjustment. Flipped over, with the stud as a reference, that would likely be about 8:00, or 180° across the spring. Two or three tiny adjustments is better than trying to do it with one tweak. Once you have the collet centered, bear in mind that adjustment can be upset when re-installing the hairspring, and the the balance and balance cock. Once the balance is back in the watch, with the balance at rest, distance between the coils of the hairspring must be equidistant from every perspective.
 
Posts
17,465
Likes
36,611
The hairspring should be flat. So lowering the stud would do that. As to centering the collet, I would make the adjustment at about the 2:00 position on the overcoil. That is, the 2:00 o'clock position viewed from the under side as shown. Obviously, that perspective would change once you turn the hairspring over to make the adjustment. Flipped over, with the stud as a reference, that would likely be about 8:00, or 180° across the spring. Two or three tiny adjustments is better than trying to do it with one tweak. Once you have the collet centered, bear in mind that adjustment can be upset when re-installing the hairspring, and the the balance and balance cock. Once the balance is back in the watch, with the balance at rest, distance between the coils of the hairspring must be equidistant from every perspective.

👍

I'll get on to it tomorrow, I'm about to watch footy (Australian Rules Football) and enjoy an afternoon beer. I don't think beer and hairspring manipulation are a good mix.😁

I've also just finished checking the balance for true and poise so I'll post some shots later at half time
 
Posts
17,465
Likes
36,611
Here's my balance wheel being checked for true in flat and round. I think it's OK.
Don't know if I puffed too hard and spun it too fast?

 
Posts
17,465
Likes
36,611
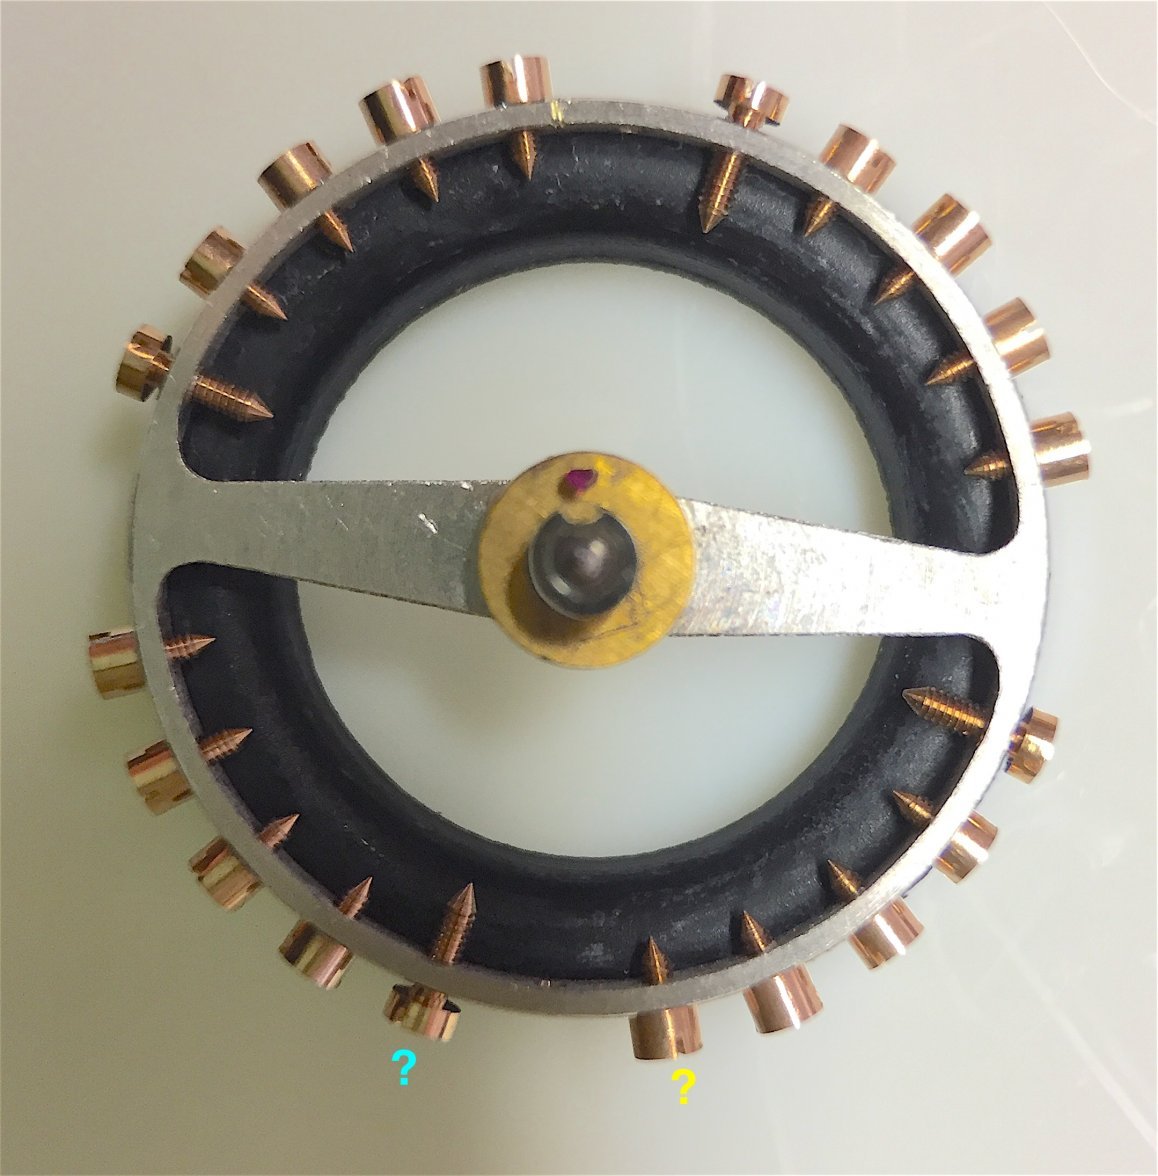
Poising check video. It seems I have a heavy spot opposite the impulse jewel.


So how the best way to correct that issue. I won't be able to undercut any screws (as per @Archer method recently) and I missed out on a set of tools that shaved a chamfer on the screw heads, so I'm probably looking at drilling or stoning.

Any suggestions?

 
Posts
2,219
Likes
4,946
You're getting some good advice here Jim. This is the way that I work but, others may disagree a little (let's see😉).

I make significant changes to balance springs in the same way as @Canuck and find that way, with the cock upside down, is the best way to get the concentricity with the jewel - just little by little and make sure you keep your manipulators at 90 degrees. By the way, if you're taking that picture with a microscope, mine only takes pictures through the left lens so, it always looks off compared to using both eyes. Don't forget to have the stud tightened down in the cock or everything will be suspect.

Very hard to see in the truing video but there does seem to be a slight wobble. The flat spring should be adjusted so the tip is just below the rim of the balance wheel and it'll be more obvious. If there is a slight variation, I use that spring to adjust it by moving it up a little to touch the wheel rim and rotating slowly - again, little by little. You don't need to spin it fast. If it moves out of position afterwards then the wheel is loose on the staff and needs the rivet tightening.

Your poising error is not huge by the looks of it. I make sure the wheel is just resting on the ruby jaws on it's pivots after cleaning the jaws with a little pith wood and blowing them off. Then touch the wheel rim to start it rolling slowly - I use a single brush hair for that. Importantly, don't breathe in the vicinity or have any gusts from an open door. Best way to correct is to add a timing washer opposite your heavy spot as it's reversible but, getting those screws out and in again with a washer, is difficult with a screwdriver. There's a special tool to do this but, a very small pin vice could work. I assume you used the bubble level mounted on the ruby jaws to get the poise tool level? Not in it's seat.

When you put the hairspring back on, press on the collet with the staking set and do this again after you rotate the collet to correct beat error.

Good luck as you're into some complex stuff here.

And what happened to the amplitude???

Cheers, Chris
 
Posts
15,190
Likes
44,627
Poising. Do you not have timing washers available? Perhaps a 30-second timing washer on the light side. Because this is a solid rim balance, slight adjustments to poising the wheel can be done by using the meantime screws. Turn the meantime screw on the light side out about 1/8 of a turn, and put he wheel back on the poising tool. This is an adjustment that can be undone. Make certain the jaws of the poising tool are horizontal, jaws clean, and no chips.
 
Posts
29,115
Likes
75,242
I would go back and true the wheel again - still has a wobble that is too much IMO.

On the poising, just a few things to mention:

As Chris mentioned, you need to level the tool with the bubble level on the cleaned jaws. I clean the jaws with a piece of pith wood dipped in alcohol, and then blow them dry using your hand blower. If you do the actual poising with your elbows sitting on the work bench, do the levelling with your elbows on the work bench also - if you don't even with a sturdy bench you can affect the level just by resting your arms on the bench.

Hard to see in the video, but my impression is that you have the jaws too close together, and may be touching the radius of the staff - the balance needs to be riding completely on the straight portion of the pivots only.

Going by the video, you need to give the balance more time to settle in your poise checks. You tended to jump right back on the blower when the balance was still doing a bit of a wobble. I have seen balances appear to nearly stop, but under magnification they are doing a little wobble, and sometimes 10 or 15 seconds go by of this, then they start to move again. Poising requires a lot of patience, and doing several tests to confirm that if there is a heavy spot, it stops in the same place each time. Only when it stops in random positions over several tests is the balance in poise.

Note that dynamic poising can often introduce an error in the static poise. For me personally, I probably would have gone right to dynamic poising on this one - I typically only static poise right after a staff change, if the error is very large, or if the balance is missing a screw or something like that. If someone has already done dynamic poising, you may be taking out the adjustment they have already made by doing a static poise. Nothing wrong with that, but it may end up in more work in the end.

Whenever possible adding weight to the balance is preferable to removing it by cutting screw or the balance itself. Of course with a smooth balance you don't have much choice but to remove material directly from the balance.

Cheers, Al