Question for modern injuneers

Posts
17,465
Likes
36,611
Back in the old days, I often used an outside micrometer. A picture for those who don't know what that is.


Before it was used to measure, it had to be calibrated. This was done by cleaning the faces of the anvil and the spindle, and then using a standard (cleaned as per before, usually with the cleanest rage in the bin).

PS: A standard was a length of precision steel rod with perfect dimension, e.g.: 1", or 25mm etc.

If the reading of the micrometer met the standard, all was OK (and usually was).

However, if the previous user had used the micrometer as a G clamp, or other substitute tool, the reading would be incorrect.
In that event, the thimble (big turney bit) could be unlocked and aligned so the correct dimension could be read on the barrel/thimble alignment.

However.......I now use digital callipers, and there is no "standard" supplied with them.

Procedure is to clean the faces of the jaws (using a very clean cloth this time), close the jaws with normal force, press a "zero" button, confirm the display says "0.00mm" and we're done.

My Luddite question is, does "zeroing" accomplish the same function as was done with calibrating to a standard?
 
Posts
1,433
Likes
6,585
Back in the old days, I often used an outside micrometer. A picture for those who don't know what that is.


Before it was used to measure, it had to be calibrated. This was done by cleaning the faces of the anvil and the spindle, and then using a standard (cleaned as per before, usually with the cleanest rage in the bin).

PS: A standard was a length of precision steel rod with perfect dimension, e.g.: 1", or 25mm etc.

If the reading of the micrometer met the standard, all was OK (and usually was).

However, if the previous user had used the micrometer as a G clamp, or other substitute tool, the reading would be incorrect.
In that event, the thimble (big turney bit) could be unlocked and aligned so the correct dimension could be read on the barrel/thimble alignment.

However.......I now use digital callipers, and there is no "standard" supplied with them.

Procedure is to clean the faces of the jaws (using a very clean cloth this time), close the jaws with normal force, press a "zero" button, confirm the display says "0.00mm" and we're done.

My Luddite question is, does "zeroing" accomplish the same function as was done with calibrating to a standard?

Not in the world of industrial QC. Our customers specs vary. In most cases we have to verify accuracy before use of the tool.

You should be able to source a set of cal blocks pretty reasonably priced. Keep them safe (and rust free) and they should outlast you and your grandkids.

In the real world, ie - around my house; I use a vernier and traditional micrometer without cal blocs (doing the zero check you described). It suits my needs, but I don't fiddle closely with watches, so it might not be ok for you.
 
Posts
15,190
Likes
44,625
Maybe it is the quality of digital caliper that I have, but after “zeroing”, when I use it, it reads on the small side. I find them useless for watch work, outside measuring a bezel for a crystal. But even then, I usually have to add about 0.10 mm or more, when selecting a crystal.
 
Posts
29,115
Likes
75,241
If you really want to get down to the details, you would need to use a gauge block that is tied to a certification of some kind, usually done through your country's standards bureau. In the US it would be NIST, and here in Canada it's the NRC (National Research Council).

These blocks would have to be sent out for certification themselves on a periodic basis, to ensure that they are in good order, and measurements would need to be made in a temperature controlled environment when used.

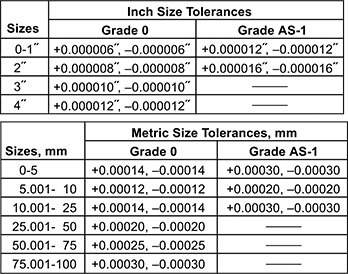
But this all depends on the sort of accuracy you are after. You can likely buy gauge blocks to do these checks, but they do come in different grades, so understanding those and how they are checked and certified, would be important. Just looking in McMaster-Carr (industrial supplier I used for many years back when I was dong the engineering thing for a living) you can see the grades offered and their respective tolerances:


You should also be able to find a calibration service somewhere in Australia. I would ask the supplier of the calipers for more information on this.

Cheers, Al
 
Posts
3,495
Likes
8,760
Here is a really cheap caliper that I keep in my desk. This is a closed as it gets 😒

 
Posts
15,190
Likes
44,625
I also have an old fashioned analog vernier caliper. With that one, 0.05 mm is as close as it will read.
 
Posts
792
Likes
915
If you want decent readings, you still use a mic.

A set of gauge blocks can be had for the price of a few mics.
 
Posts
32
Likes
333
The digital caliper is a very useful workshop tool as is the vernier caliper but when accurate measurements are required then a micrometer in its many guises is the tool for the job. Assuming it has been calibrated and is used correctly.
 
Posts
2,646
Likes
4,219
I still have a micrometer in the tool drawer. I also have the compas style digital caliper (that looks like a stethascope.) the other calipers I have are the dial reading kind.
I was taught to use a sheet of paper to wipe the faces before taking critical measurements. Never checked them against any sort of gauge block. Guess I am the trusing sort.

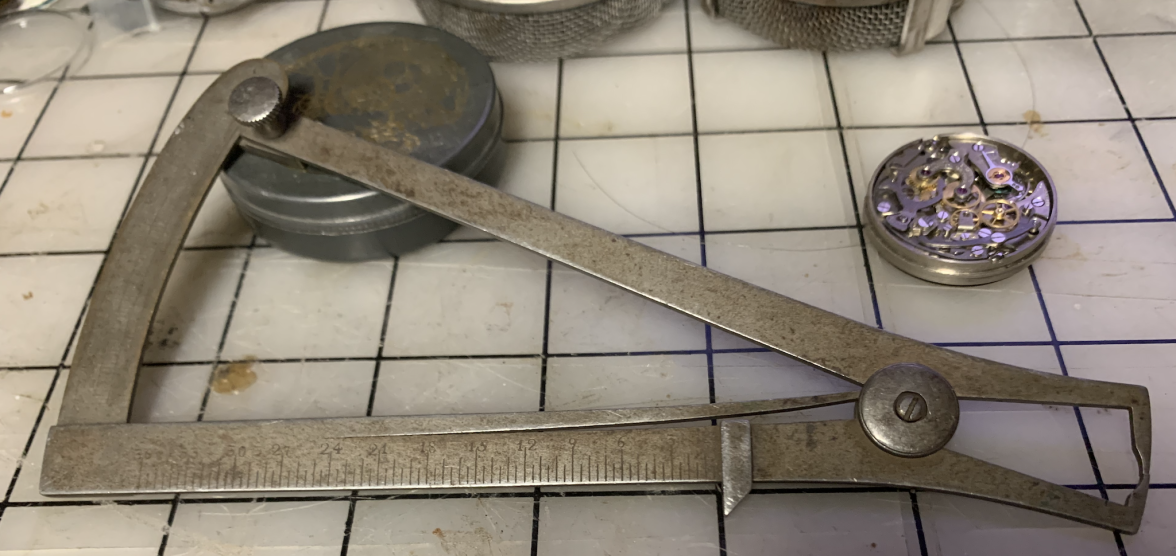
One of my mentors has me use these to turn a balace staff. (might have been a bit of a joke.) I think it was called a duizuim[sp] guage. I tried giggle search which says that a ligne is 1/144 a pied. What ever the scale it is what old balance staffs were mesured to. The lemania movement does measure 12. So I am pretty sure that scale is lignes. The arc scale is 72 and opens to about 6 lignes. I have not been able find what this is called. Not a bad system as there are no fractions to deal with. Quarters and thirds are integers. (which is why the us will not give up the similar english system.) Then I am a bit partial to furlongs per fortnight (when describing the speed of lava flows from volcanos.)


Of course t his is not calibrated at all. But the vernier reading is still pretty much on the zero mark.

-j
 
Posts
29,115
Likes
75,241
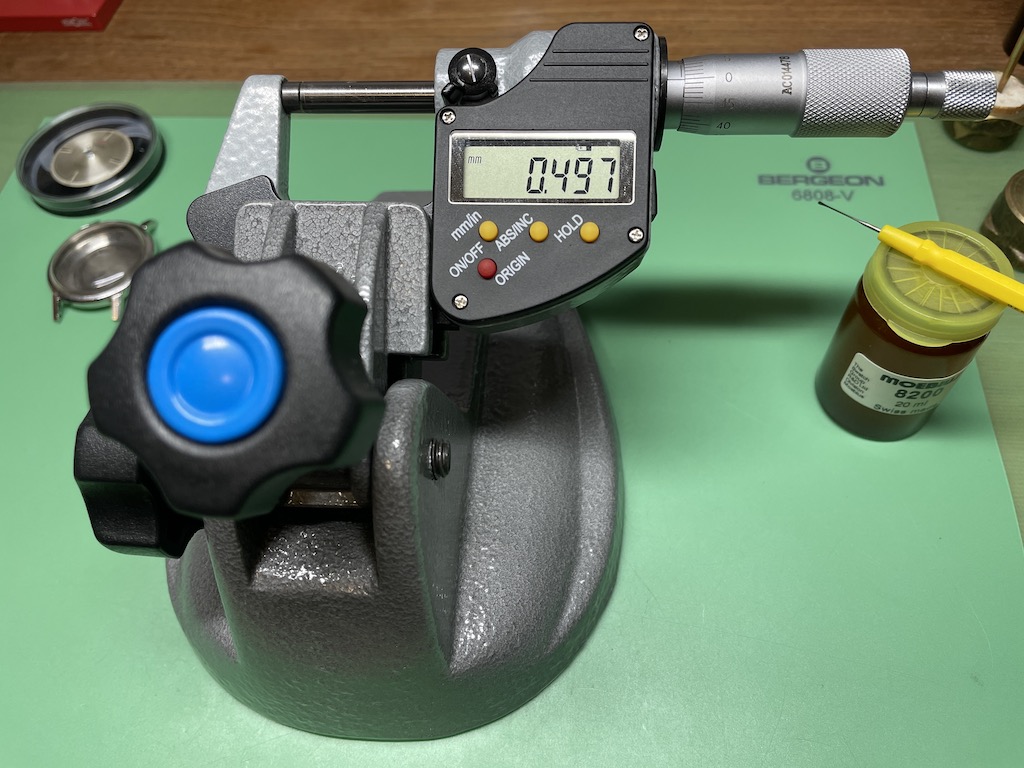
Used these since 1978...from shop classes, through my engineering days, and now as a watchmaker, they get used often.